Transforming your outdoor space with a fresh deck restaining can feel like an overwhelming task, but it doesn’t have to be. A weathered and worn-out deck is a common eyesore that many homeowners face, leaving them unsure about whether to call in the professionals or take on the task themselves.
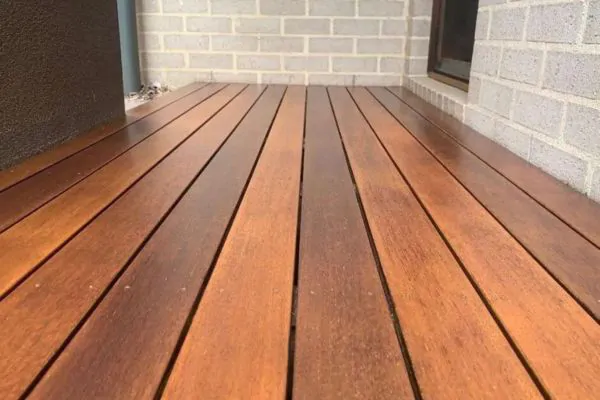
Decks inevitably lose their vibrancy over time due to constant exposure to sunlight and other elements; research shows that periodic maintenance extends not only the beauty but also the life of your wooden haven.
This guide cuts through the complexity and delivers straightforward steps on how to restain a deck with results that scream ‘pro’. From preparation and stripping old finish to selecting your stain and applying it evenly, we’ll walk you through each detail of rejuvenating your decking area.
Prep Your Deck for Stunning Rejuvenation
Kicking off your deck rejuvenation starts with a thorough preparation. Clear the entire deck area, ensuring furniture, grills, and potted plants are out of the way. This gives you ample room to work and protects items from damage or stain splashes.
Check for any loose boards or protruding nails that could hinder your progress and address these issues promptly. Repairing these small defects not only makes restaining easier but also extends the life of your deck.
Next up is cleaning – an absolutely critical step before staining an old deck. Dirt, mold, mildew, dust and old flaking stain must be removed to ensure the fresh coat adheres properly and looks its best.
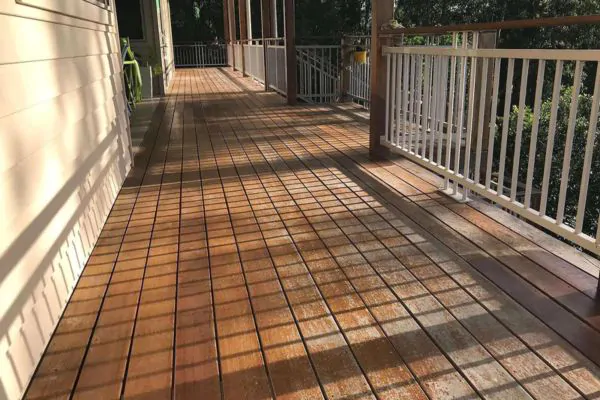
Use a quality deck cleaner following the manufacturer instructions; this will help strip away grime without damaging wood fibers. For decks needing extra attention, consider using a pressure washer at a low setting to avoid gouging the wood.
Gathering Your Tools and Materials
Before you begin the restaining process, it’s crucial to gather all the necessary tools and materials. This includes items such as a pressure washer, sander, deck stain, paintbrushes or rollers, protective gear like gloves and eyewear, and cleaning solutions.
These supplies will ensure that you have everything needed to achieve a professional-quality finish on your deck.
Essential Supplies for Professional Deck Restaining
Gearing up for deck restaining requires having the right supplies on hand. You’ll need a high-quality stain that matches your desired look, and don’t skimp on this; it’s what will protect and beautify your wood for years to come.
Stock up on various brushes or rollers specifically designed for applying stain; these tools help achieve an even coat without wasting product. For those hard-to-reach spots, invest in a quality extension pole—it’ll save you time and reduce the strain of stretching or bending.
Don’t forget protective gear such as gloves, goggles, and masks to shield yourself from chemicals during the application process. Lastly, keep plenty of rags around to handle spills quickly because maintaining a clean workspace is crucial when aiming for professional results.
Prepping the Deck Surface
Begin by ensuring the deck is completely clear of furniture, grills, and potted plants. This will give you unobstructed access to the entire wood surface.
Check for loose boards or protruding nails that might hinder your progress and repair them as needed—it’s vital to have a smooth canvas for an even stain application.
Next, sweep away any debris like leaves or dirt. Use a stiff-bristled brush to scrub away accumulated grime and spots of mildew that can prevent stain from adhering properly. If there are remnants of old finish or paint, use a quality deck stripper product tailored to your particular decking material; follow the instructions carefully for safety and best results.
After stripping, rinse thoroughly with water—this prepares your deck for cleaning products that will help restore its natural look before you apply the new stain. Remember to allow ample drying time after washing; moisture trapped under stain may lead to peeling and shorten the life of your hard work.
Stripping the Old Finish
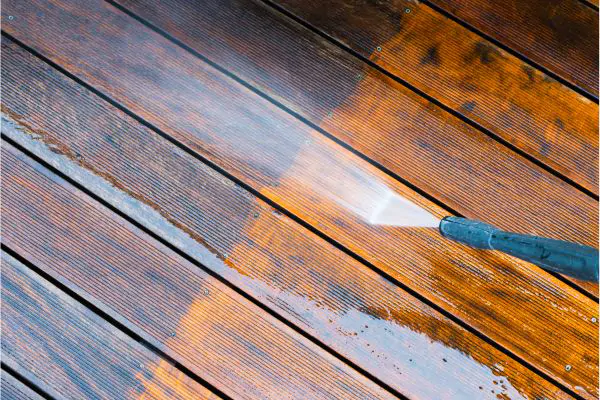
Before applying a fresh coat of stain, it’s crucial to remove the old finish from your deck. This step will ensure better adhesion and a more uniform appearance for the new stain. The right stripping method and safety precautions are essential for this stage of the process.
Choosing the Right Stripping Method
When choosing the right stripping method for your deck, consider whether you need to remove a solid stain or a clear sealant. If you have a solid stain, sanding or using a paint stripper may be necessary.
For clear sealants, opt for pressure washing as an effective method. Evaluate the condition of your deck and choose the stripping method that best suits its current state.
When deciding on a stripping method, take into account the environmental impact as well. Some chemical strippers can be harmful to plants and pets, so it’s essential to select one that aligns with your eco-friendly preferences.
Safety Measures during Stripping
When stripping the old finish from your deck, prioritize safety measures to protect yourself and others. Wear protective gear such as safety goggles, gloves, and a mask to shield against potential hazards.
Cleaning and Sanding
To achieve a flawless restain, thorough deck cleaning is crucial. Proper sanding techniques can ensure a smooth and even surface for the new stain to adhere to.
Thorough Deck Cleaning Tips
To ensure a pristine result, start by removing all dirt and debris from the surface of your deck using a stiff-bristled brush or power washer. Next, prepare a cleaning solution with warm water and mild detergent, applying it to the deck’s surface in sections before scrubbing thoroughly.
Rinse off the soapy residue with clean water. Don’t forget to address hard-to-reach spots such as between boards or under railings. Finally, allow ample time for your deck to fully dry before moving on to the next stage of restaining.
Related Post: 7 Tips To Keep Your Deck Safe
Proper Sanding Techniques
To achieve professional results when restaining your deck, mastering proper sanding techniques is essential. Begin by using a coarse grit sandpaper, around 60-80 grit, to effectively remove any remaining old stain or rough patches on the wood surface.
Next, switch to a medium grit sandpaper, approximately 80-120 grit, to smooth out the deck’s surface and ensure an even finish for the new stain application. Lastly, use a fine grit sandpaper, about 150-180 grit, for a final smoothing before applying the new stain.
Selecting the Perfect Stain
When it comes to selecting the perfect stain for your deck, you’ll need to consider the types of stains available and the color options that will best complement your outdoor space.
Understanding these factors will help you achieve a professional-looking finish when restaining your deck.
Types of Deck Stains
When selecting a deck stain, there are several types to consider. Transparent stains allow the wood’s natural beauty to shine through and provide minimal protection against UV rays.
Semi-transparent stains offer moderate opacity while still allowing the wood grain to show. Solid stains, on the other hand, completely mask the wood grain and provide maximum protection.
Finally, semi-solid stains fall between semi-transparent and solid options, offering more pigment while still allowing some of the wood texture to show through.
Oil-based deck stains penetrate deeply into the wood for long-lasting protection but may require more frequent maintenance. Water-based stains are environmentally friendly, with low volatile organic compound (VOC) emissions and easy cleanup, but might not be as durable as oil-based options.
Color Considerations
Now that you understand the different types of deck stains, it’s time to consider color. Color plays a significant role in the overall appearance of your deck, so choosing the right one is crucial.
When selecting a stain color, take into account the wood species and its natural hue. Light stains work well with softer woods like pine or cedar, while darker stains complement hardwoods such as oak and mahogany.
Applying the Stain Like a Pro
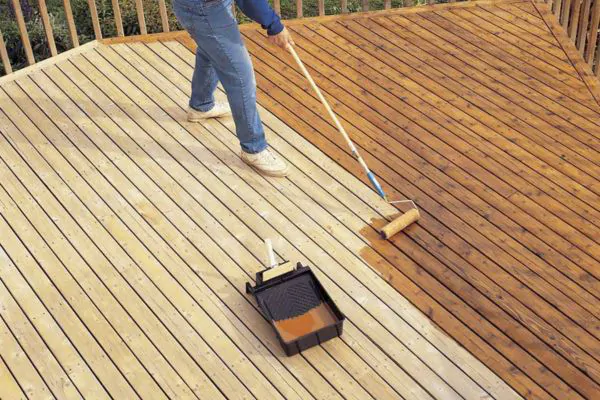
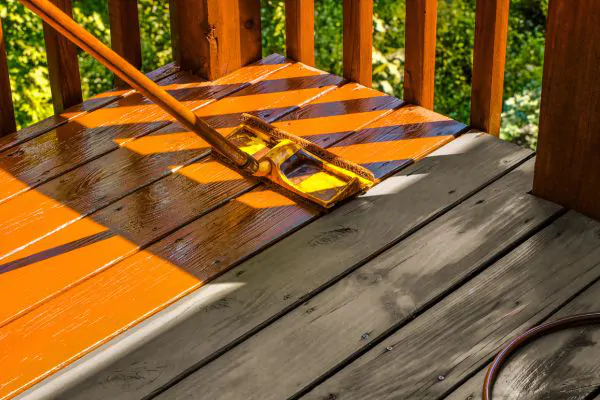
Once you have prepped, stripped, cleaned, and sanded your deck, it’s time to apply the stain. Whether you choose a brush, roller, or sprayer for application, be sure to use even strokes and techniques to ensure a professional finish.
Brush, Roller, or Sprayer: Application Methods
When it comes to applying the stain on your deck, you have three primary options: a brush, roller, or sprayer. Each method has its advantages and considerations. A brush gives you precise control and is ideal for intricate areas like railings and corners.
A roller allows for quick application on large flat surfaces but may not reach into every nook and cranny. On the other hand, a sprayer delivers speedy coverage but requires careful technique to avoid overspray and ensure an even finish.
Techniques for Even Staining
To achieve even staining on your deck, start by applying the stain in small sections, working from one end to the other. Use long, smooth strokes with a brush or roller to ensure consistent coverage.
Wipe off any excess stain puddles to avoid uneven drying and visible lap marks. Additionally, consider using a sprayer for large areas but be sure to back-brush immediately after spraying to work the product into the wood and create an even finish.
You might like: Why Are My Deck Boards Rotting?
Cost to Restain a Deck
Restaining a deck can be an affordable way to revitalize your outdoor space. The cost of restaining a deck mainly depends on the size of the deck and the quality of stain you choose.
On average, for a typical 12×12 square foot deck, including materials and labor, it could range from $500 to $1200. Factors that impact this cost include the type and condition of wood, complexity of the job, and any additional repairs needed before staining.
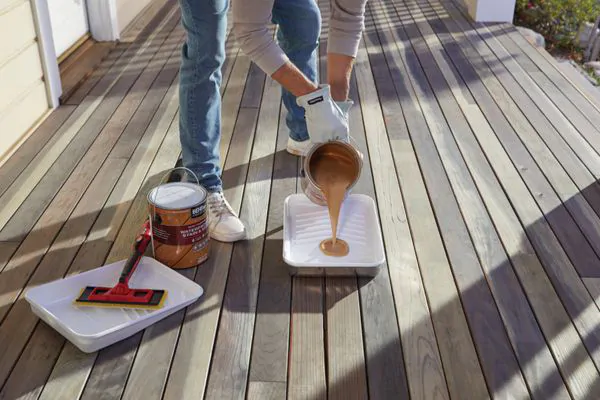
Selecting high-quality stain might mean a higher upfront cost but can lead to longer-lasting results, reducing the need for frequent restaining.
Understanding these costs in considerations will help you plan accordingly as you embark on your journey to revive your outdoor living area with a professional-looking finish.
Maintaining Your Newly Stained Deck
Keep your deck looking fresh by routinely cleaning and inspecting for any signs of wear and tear. With regular maintenance, you can ensure that your newly stained deck remains a beautiful outdoor space for years to come.
Routine Maintenance Tips
To ensure your deck stays in top condition after restaining, make routine maintenance a priority. Regularly sweeping off debris and dirt can prevent them from settling into the wood and causing damage over time.
Additionally, applying a fresh coat of sealant every year or two will help protect the wood from moisture and UV rays. Inspect your deck for any signs of wear or damage, such as loose boards or popped nails, to address them promptly before they become larger issues.
When it comes to preventing mold and mildew growth, consider using a specialized cleaner designed for outdoor wooden surfaces. This can effectively remove any buildup without damaging the wood.
Troubleshooting Common Issues
If you notice blotchy or uneven staining on your deck, it could be due to improper application. Ensure that the stain is applied evenly and consistently with a brush, roller, or sprayer.
If patches of old finish remain after stripping, reapply the stripper and scrub those areas before proceeding with the restaining process.
In case the newly stained deck develops mildew or mold, it’s essential to thoroughly clean the surface and apply a suitable mildew-resistant cleaner before restaining. Be sure to address any underlying moisture issues by contacting Ludlow Deck Builders to prevent future damages.


